No results available
Reset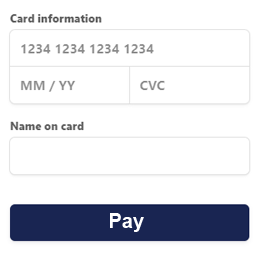
WP Stripe Checkout
by naa986
Description
Stripe Checkout plugin for WordPress allows you to accept payments with the Stripe payment gateway. With a simple shortcode, you can quickly start accepting payments on a pre-built, Stripe-hosted form that is SCA-ready and supports 3D Secure 2 authentication. This makes accepting credit card payments easier than ever with very little setup and effort.
Benefits of Stripe Payments
Easy Stripe payment integration.
Stripe payment links integration.
Accept credit and debit card payments.
Accept recurring subscription payments via payment links.
Accept donation payments.
Accept Apple Pay payments.
Accept Google Pay payments.
Accept Alipay payments.
Accept WeChat Pay payments.
Accept Bancontact payments.
Accept EPS payments.
Accept giropay payments.
Accept iDEAL payments.
Accept Przelewy24 payments.
Accept Sofort payments.
Accept Afterpay/Clearpay payments.
Accept Boleto payments.
Accept OXXO payments.
Accept ACH Direct Debit payments.
Accept Bacs Direct Debit payments.
Accept BECS Debit payments.
Accept Canadian pre-authorised debit (PAD) payments.
Accept SEPA Direct Debit payments.
Support Dynamic 3D Secure payment authentication.
Support payment processing with Stripe test cards.
Support phone number collection at checkout.
Support user redeemable promotion codes at checkout.
Localized for different languages.
Automatically email Stripe receipts to your customers.
Simplified mobile-ready experience for customers.
No complex setup like a membership/e-commerce plugin.
Easily Switch between live and sandbox mode for testing.
Send a purchase confirmation email to your customer after a transaction.
Send a sale notification email to a chosen recipient (e.g. the seller) after a transaction.
Automatic VAT/tax ID collection at checkout
WP Stripe Checkout Add-ons
Variable Price
Variable Quantity
Submit Type
Terms of Service
Payment Link Email
Variable Currency
WordPress Stripe Plugin Configuration
Once you have activated the plugin, you need to configure some settings related to your Stripe merchant account. It’s located under “WP Stripe Checkout -> Settings -> General”.
Test Mode: A checkbox that allows you to run Stripe transactions on your site in test mode using test API keys.
Stripe Test Secret Key: Your Stripe secret key to run transactions in test mode
Stripe Test Publishable Key: Your Stripe publishable key to run transactions in test mode
Stripe Live Secret Key: Your Stripe secret key to run transactions in live mode
Stripe Live Publishable Key: Your Stripe publishable key to run transactions in live mode
Currency Code: The default currency code that will be used when accepting a payment
Return URL: The page URL to which the customer will be redirected after a successful payment
Stripe Webhook URL: The page URL to which Stripe will send notification after an event
Emails
Stripe checkout plugin comes with an “Emails” tab where you will be able to configure some email related settings.
Email Sender Options
In this section you can choose to customize the default From Name and From Email Address that will be used when sending an email.
Purchase Receipt Email
When this feature is enabled an email sent to the customer after completion of a successful purchase. Options you can customize here:
The subject of the purchase receipt email
The content type of the purchase receipt email. The default is “text/plain”. But you can also set it to “text/html”
The body of the purchase receipt email.
Sale Notification Email
When this feature is enabled an email is sent to your chosen recipient after completion of a successful purchase. Options you can customize here:
The subject of the sale notification email
The content type of the sale notification email. The default is “text/plain”. But you can also set it to “text/html”
The body of the sale notification email.
You can use various template tags in the body of an email to dynamically change its content. You can find the full list of available template tags in the Stripe plugin page.
Webhook Endpoint
Go to “Developers > Webhooks > Add endpoint” and insert the URL shown in the plugin settings. Select this event – “checkout.session.completed” and click “Add endpoint”. This is where Stripe will send a notification after a checkout payment is successful.
You will also need to add the “checkout.session.async_payment_succeeded” and “checkout.session.async_payment_failed” events if you plan to use a payment method where there can be a delay in payment confirmation. For example:
Bacs Direct Debit
Boleto
Canadian pre-authorised debits
OXXO
SEPA Direct Debit
SOFORT
ACH Direct Debit
For detailed setup instructions please visit the Stripe WordPress plugin page.
How to use Stripe Checkout
The easiest way to start accepting Stripe payments is to add the following shortcode to a post/page:
[wp_stripe_checkout_session name=”My Product” price=”2.99″]
Replace the value of “name” with your product name and “price” with the actual product price.
Shortcode Parameters
You can add additional parameters in the shortcode to customize your Stripe payment button.
description – The description of the product (e.g. description=”My product description”). This is optional and no description is set by default.
button_text – The text displayed inside the button (e.g. button_text=”Pay Now”). The default is “Buy Now”.
button_image – The image that will act as the button (e.g. button_image=”https://example.com/wp-content/uploads/pay-now-button.png”). The default is a plain button with the text “Buy Now”.
success_url – The URL to which Stripe will redirect upon completion of a successful payment (e.g. success_url=”https://example.com/success”). The default is the Return URL specified in the settings.
cancel_url – The URL to which Stripe will redirect after a payment is canceled. (e.g. cancel_url=”https://example.com/payment-canceled”). The default is the home URL for your site.
billing_address – Specify whether Checkout should collect the customer’s billing address. (e.g. billing_address=”required”). The default is “” (Checkout will only attempt to collect the billing address when necessary).
phone_number_collection – Specify whether Checkout should collect the customer’s phone number. (e.g. phone_number_collection=”true”).
allow_promotion_codes – Specify whether Stripe should allow user redeemable promotion codes at checkout. (e.g. allow_promotion_codes=”true”).
tax_id_collection – Specify whether Checkout should automatically show the tax ID collection form depending on your customer’s location. (e.g. tax_id_collection=”true”).
consent_collection_promotions – Specify whether Checkout should automatically collect consent from customers so you can send them promotional emails. (e.g. consent_collection_promotions=”auto”).
prefill_wp_email – Specify whether the plugin should automatically pass the user’s email address to Stripe. (e.g. prefill_wp_email=”true”). This requires the user to be logged in to WordPress.
class – Custom CSS classes for the button (e.g. class=”btn”). Multiple CSS classes can be added in a space-delimited format (e.g. class=”btn btn2 btn3″).
target – Specify whether the button should open in a new tab. (e.g. target=”_blank”).
How to use Stripe Payment Links
This method allows you to integrate Stripe payment links with the plugin.
Step 1: Create a Payment Link
Log in to your Stripe account dashboard and navigate to the “Payment links” page (Payments > Payment links). Select an existing product or add a new one to create a payment link.
Step 2: Use the Payment Link in a Shortcode
In order to create a button with the payment link you can add the following shortcode to a post/page:
[wp_stripe_checkout_payment_link url=”https://buy.stripe.com/live_6gPE4jw7dMbUKdd3345″]
url – URL of the payment link created in your Stripe account.
Shortcode Parameters
You can add additional parameters in the shortcode to customize your Stripe payment link button.
button_text – The text displayed inside the button (e.g. button_text=”Pay Now”). The default is “Buy Now”.
button_image – The image that will act as the button (e.g. button_image=”https://example.com/wp-content/uploads/pay-now-button.png”). The default is a plain button with the text “Buy Now”.
For detailed setup instructions please visit the Stripe payments plugin page.

Lorem ipsum dolor sit amet, consectetur adipiscing elit. Ut elit tellus, luctus nec ullamcorper mattis, pulvinar dapibus leo.

To create a collection, simply click on the ![]() symbol on the desired plugin.
symbol on the desired plugin.
You can see this symbol when you move the mouse over the plugin.
Current Level
You have reached 0 views on your collections and are currently Plugin Magican. You magically help people find the right plugins and are a great asset to the community